Welcome To Lazarus

Instead of a "BANG", humanity is passing away with the shuffling of dead feet, and hungry moans. Desperate men and women fight against the rising tide for the newly risen dead.Sometimes, though, the undead are not he most dangerous things out there. Civilization has failed the test; the only thing left is survival.

Lazarus is just one of many places where humanity holds on by a thread, and life and death come as easily as a roll of the dice.

Saturday, April 30, 2011

To Serve And Protect - ATZ Campaign Day 1

I wanted to start off my campaign with several short games, just to set the tone.  There are no Stars, as of yet, and everyone is cannon fodder at this point.  A brave soul may survive, to become one; time will tell.

9-11 Dispatch: "Lazarus 911, what is the nature of your emergency?"
Caller (old woman's voice): "You need to send police over here immediately.  One of the prostitutes that live in my apartment building is attacking the UPS guy out on the sidewalk."
9-11 Dispatch: "Ma-am what is the address of you location?  We'll get a patrol car over there immediately."
Caller: "Oh dear, hurry, it looks like she's gone crazy and is really hurting him."
9-11 Dispatch: "Yes, ma-am, stay inside and lock you door, help will be there shortly."
9-11 Dispatch: "Patrol 13 codes J-04 at.....please respond."

Setup:
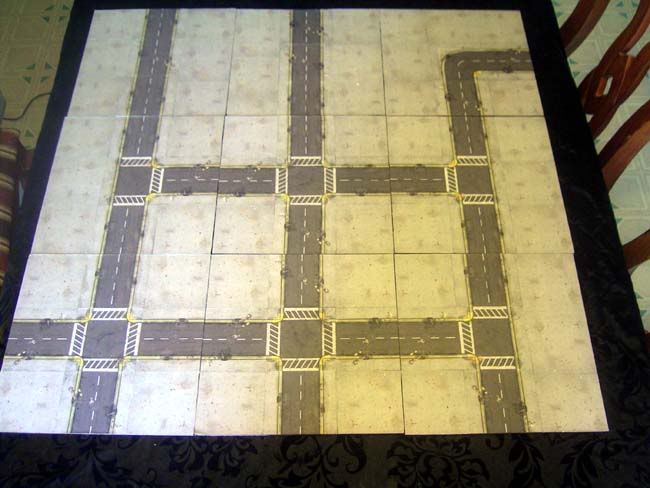
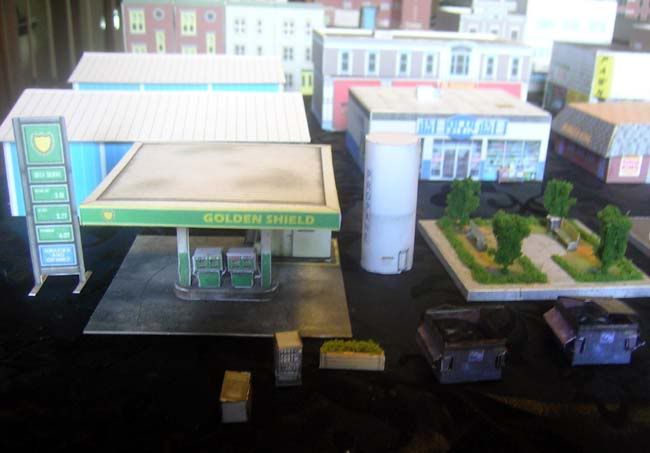
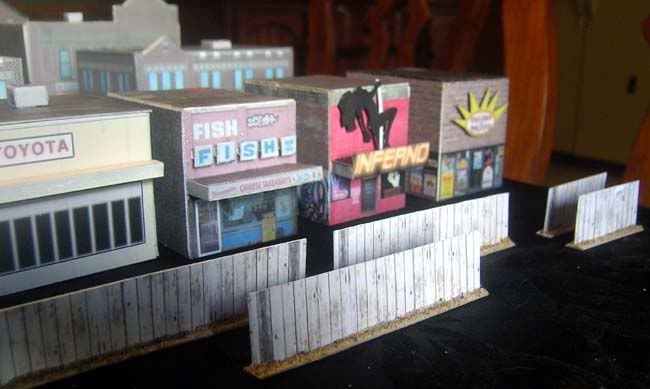
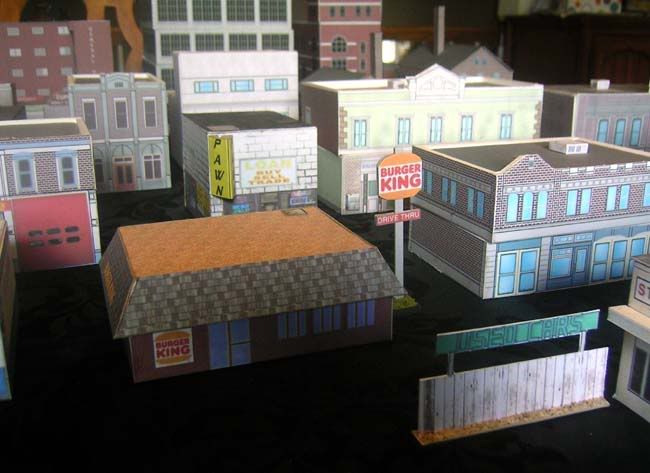
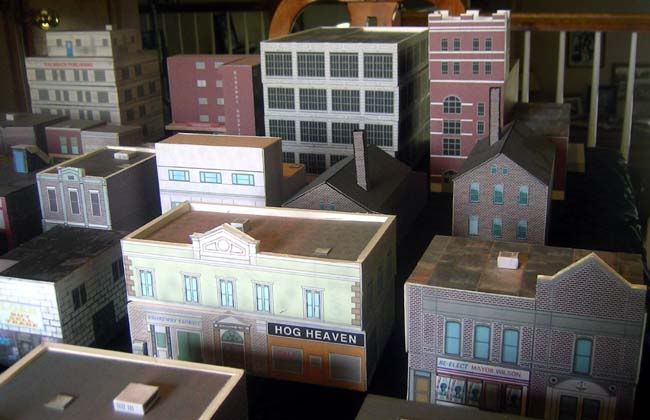
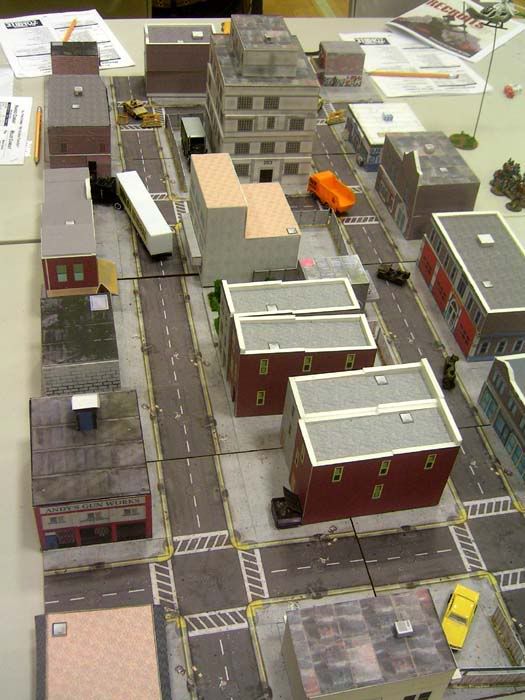
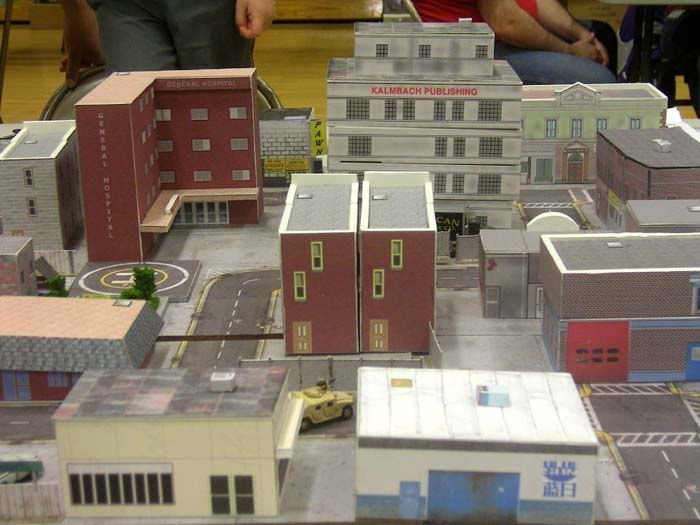
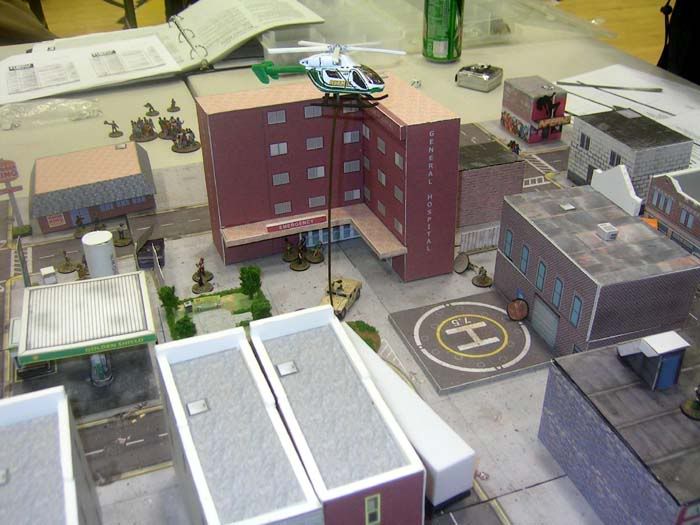
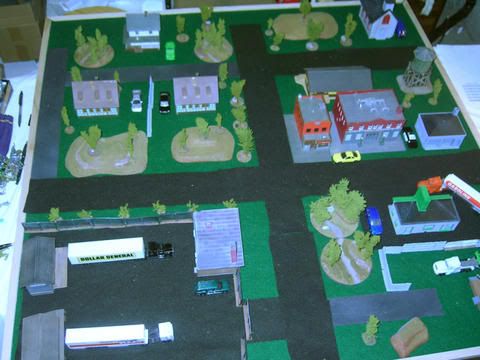
Downtown Lazarus: It is an urban location, in the seedier part of Lazarus.  Lazarus PD patrol car 13 has been dispatched on an assault call.  Officers Jones and Baakus (both Rep 4, armed with pistols and batons) are expecting nothing more than one of the locals who is high on meth causing trouble.
Downtown Lazarus


Turn 1: (Police 3, Zombies 2)
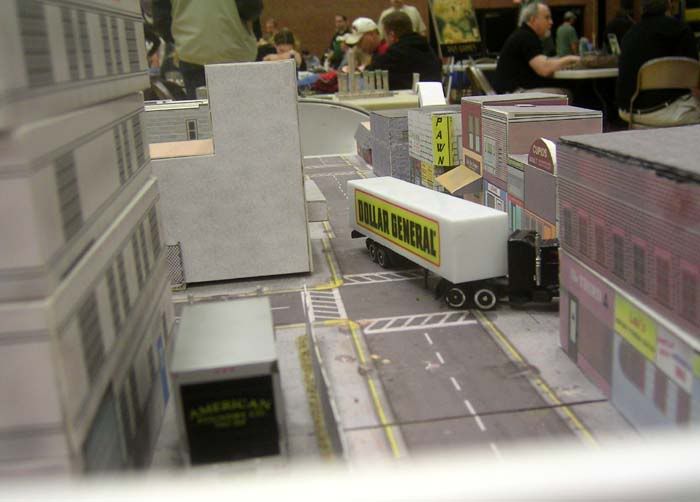
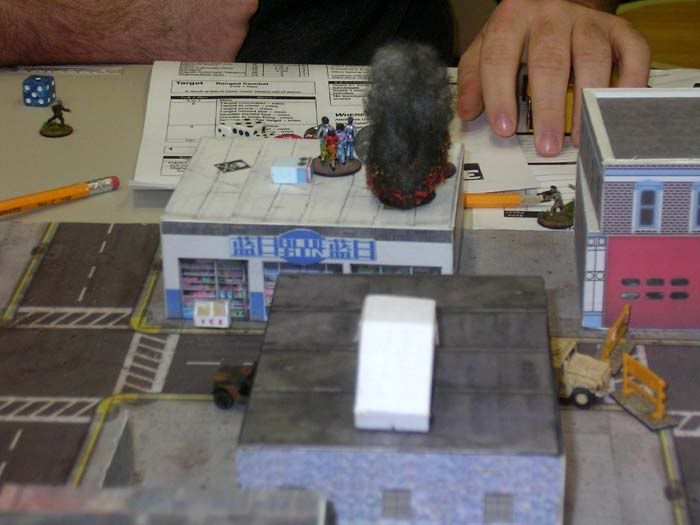
Patrol 13 en-route.
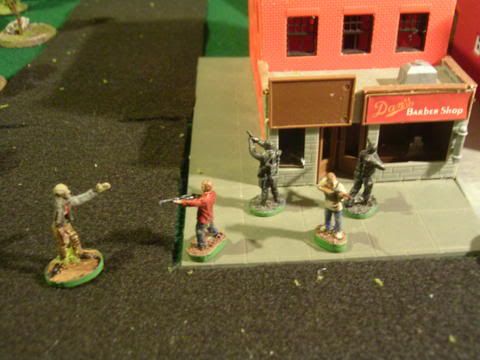
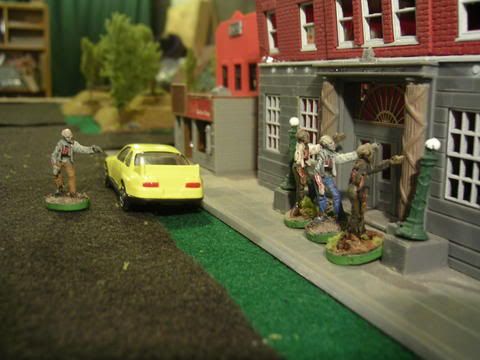
Police Move:  The patrol car arrives on scene, and the police officers exit the vehicle.  They see what looks like a hooker bent over a body dressed in UPS brown on the side walk.  
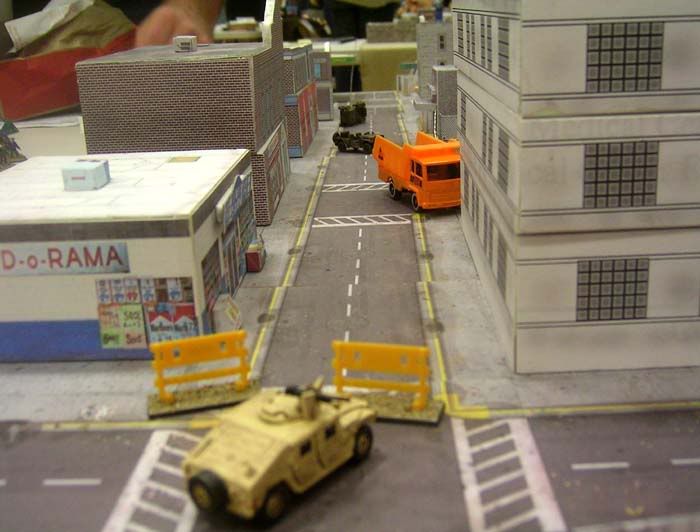
Officers Baakus and Jones exit their car.
They both pass 2 on a "See the Feast" roll.  Since it is Day 1, I decided that they don't understand what's going on, and must take a "Zed No Zed".  Officer Baakus passes 2 and recognizes that the man is being brutally attacked by the hooker.  He also recognizes the hooker as one of the regulars (double on "Zed No Zed" test) and calls her name.  Officer Jones passes 1 on the roll and doesn't recognize the threat.  He advances towards the hooker.  

Zombie Move:  The zombie charges Officer Jones and they begin grappling. As they struggle, Jones bashes the zombie's head on the concrete; killing it.
The Zombie hooker attacks.
Turn 2: (Zombies 3, Police 1)
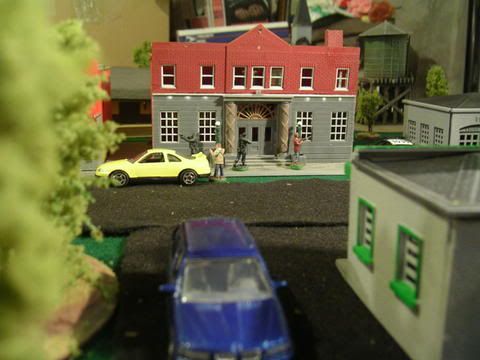
Zombie Move:  The body of the downed UPS driver stirs and rises to its feet; turning to face the officers.

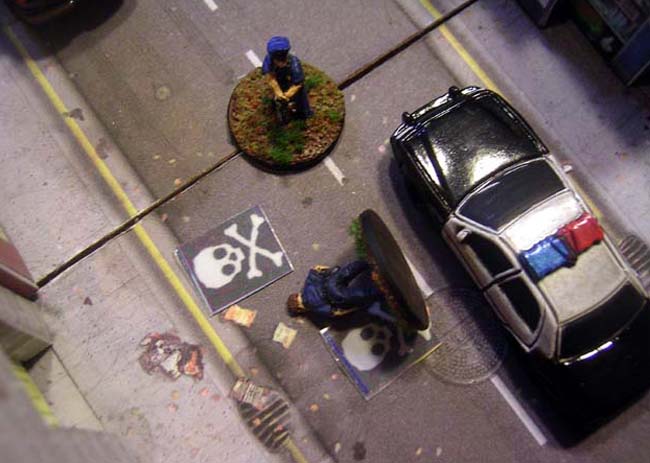
Officer Jones is attacked from behind.
Police Move:  Events are moving fast, and Officers Baakus and Jones still don't understand the nature of the threat (GMs prerogative).  They take another "Zed no Zed" test, which they both pass 1.  As a result, the zombie charges the closest officer.  This happens to be Officer Jones, who has his back turned as he looks down at the dead hooker (-2d6 in melee; again GMs prerogative).
Officer Down!

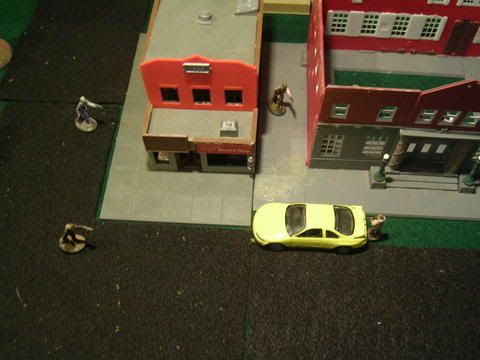
The zombie scores one more success than Jones and knocks him out of the fight.  At this point, Officer Baakus pulls his baton (+1D6 in melee) and charges around the car to aid his partner.   He swings at the zombie, which is bent over Officer Jones. He connects, but does no damage (0 successes on melee roll).

Turn 3: (Zombies 3 Police 1)
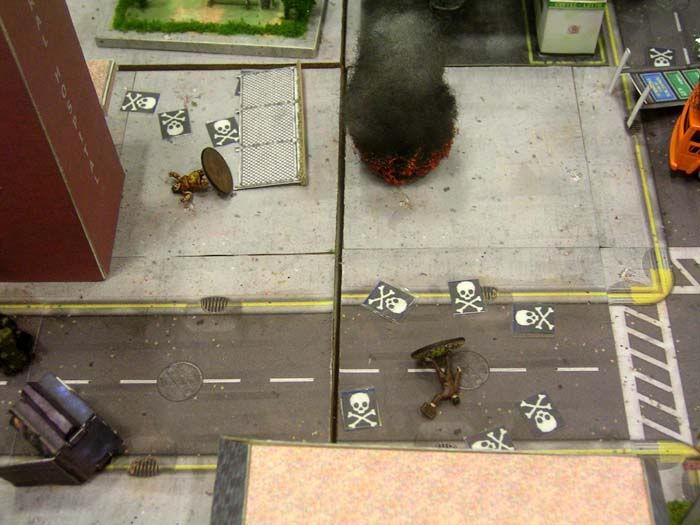
Zombie Turn:  After being struck from behind, the zombie turns on its attacker.  Officer Baakus brings his baton down on zombie's head and splits it open. It lays dead in the street.
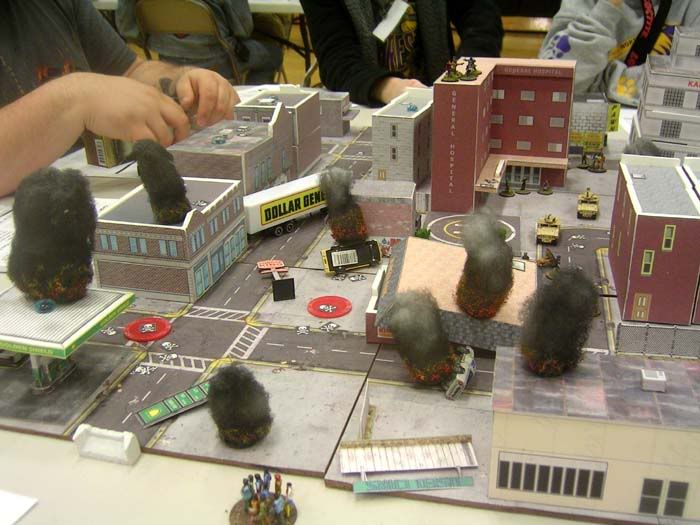
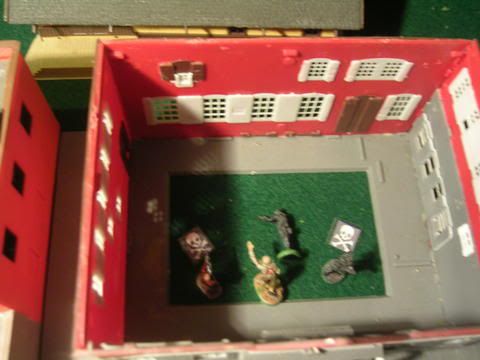
Baakus stands over 2 dead zombies and his wounded partner.
After the fight:
Officer Baakus frantically applies first aid to his partner, who is bleeding profusely from a bite wound to the neck.  He calls for an ambulance.  Help arrives and Jones is rushed to the hospital; hanging on to life by a thread.  The ER staff works to stabilize him; little do they know, though, he is infected (roll of 6 (4+2) on a “Harry Are You Okay?” roll).  Soon, he would be among the first living dead in Lazarus, but definitely not the last...

Wednesday, April 27, 2011

Rebel Mini's Zombie Pack #3

I got a pack of the newest Zombies from Rebel Minis.  These are some of the best they've put out, and by far has one of the best 15mm figures in it...the Zombie Clown.  There are 21 figures in the pack.  IMO a must for your Zombie Horde.


A little bit of "coolness" with these. You may have seen the group photo on at the top of The Miniatures Page, or on Rebel Minis site. I sent the photos to Mike at Rebel, and he decided they were worth using to pimp the minis.

Friday, April 22, 2011

The Dead Shall Consume - 20mm Zombies From Elheim Miniatures

Keeping along the lines of Zombie gaming in 20mm (1/72nd), here are some pics of zombies from Elhiem Miniatures - The Dead Shall Consume range. I highly recommend them; Matt is a talented sculptor, and a good guy to boot.


Monday, April 18, 2011

Zombie Gaming On The Cheap - 1/72nd Plastics

Ok, "on the cheap" is a relative term in the world of miniature war gaming.  Any gamer who has bought more than one figure in their lifetime can attest to that.  Still, as a frugal gamer, there are ways to put a lot of figs on the table, without putting too much hurt on the pocket book.  Most people Zombie game in either 28mm, or 15mm metal.  I'm here to tell you there is an inexpensive alternative; 1/72nd Plastics (20mm ostensibly).

With advances in plastics production in recent years, along with the rising interest in 20mm ranges, outside WWII, you can fill the table with not only survivors, but hordes of zombies, as well.  Here are my suggestions:

SURVIVORS:
Caesar  Miniatures has several boxes that provide amble choices for survivor types, and are the place I would look first.  The boxed sets below can be gotten for around $9.00 - $10.00 USD on line, and provide anywhere from 36-41 figures each.


So, for around $30 + shipping you can get upwards of 120 survivor figs.  If you are industrious, like I was, you'll paint up the best poses for yourself, and sell the rest, recouping your $$$.  Paint the ones you sell, and you can actually making a small profit, which will help pay for the...

ZOMBIES
There is only one company that I know of that makes plastic zombies, compatible with 1/72nd/20mm, and that is "Twilight Creations"; producers of the beer and pretzel game series "Zombies".  The zombies come in only 4, maybe 5, different poses, but can be bought in bags of 100 (aptly named "Bag O Zombies") for again, about $9.00 - $10.00 USD on line.  The differnt main types of zombies they offer are:

the basic zombies which come in the boxed game, as well in the voluminous "Bag O Zombies"...


Bag O Zombie Babes...


The oh so fun "Bag O Zombie Clowns...


Not pictured are the Zombie dogs, for a little Resident Evil action, and the Glow In The Dark Zombies, which are the basic Zeds which glow in the dark.  Maybe there is a  Zombie Chernobyl scenario to be had there someplace.  The Zombies game also offers a lone Survivor pose that could be used as well; if one was inclined.  What I did was buy the basic Zombies game.  This gave me a slew of Zombies to use, as well as a game to play with the kids that was a quick and enjoyable diversion.

What Do They Look Like Painted?
That's a great question; I'm glad you asked.  See that just goes to prove the superior intellect of those who follow my blog; they ask these timely and pointed questions.  Here are some shots of what some of the above mentioned plastics look like:

Zombie babes and basic Zeds:


Mixed Zombies and a 5 man Caesar SAS team (discontinued, but some of the poses made it into the "Modern Special Forces Worldwide box):


Mixed Zombies and a 6 man Caesar US Army team:


What About Terrain and Vehicles In This Scale?
Well, this post was really meant to be about figures that you could use.  Since no one wants to game on a flat, featureless surface, I'll touch on it.  In 1/72nd / 20mm scale the best way to go is with HO scale model RR buildings.  They can be expensive; if you watch E-Bay hard, you can find some really good deals, though.  As far as vehicles go, you can choose anything from die cast cars from the Dollar Store to metal 20mm military vehicles to go with your figs.  Go back to the "Welcome To Lazarus Battle Report" post to have a see of what you can do in regards to terrain and vehicles.

Final Pontifications
I focused on Caesar for us as survivor types, because they give the best variety, within a manufacturer line.  With that said, any 1/72nd scale modern military figs would work.  Other manufacturers, Revell and Orion come to mind, do modern sets as well; US Infantry, German KSK and Chechen Rebels.  Caesar also does a French Army/Chinese PLA set (weird combo, but it sells, I guess), so you could do a  scenarios almost anywhere in the world if you wanted.  Don't be constrained by pre-conceived notions of plastics and different scales; there is a lot more to choose from than first meets the eye.

Wednesday, April 13, 2011

The Streets Of Lazarus - How're They Made?

The question has been asked, "How did you make the city scape for your convention game?" The tiles are MDF, with World Works Games "Mean Streets Of Mayhem" street tiles glued on (9 total for each board). They are scaled down to 65%, via Photoshop. The gas station and small accessories (phone booths, vending machines, etc) are also WWG


The rest of the buildings are a mixture of free down loadable stuff and buildings off a CD I bought on ebay years ago, that has buildings for scale RR enthusiasts to use. All the buildings are mounted on foam core I salvaged from work.  They are fit together nicely, in my opinion.


Here's a link to a Warseer thread with good stuff on it: Warseer Paper Buildings Thread.

Monday, April 11, 2011

The Dead Invade Spring Recruits 2011

Spring Recruits 2011 was held the weekend of March 25/26th/27th, in Lee's Summit, MO. Despite attending twice a year for the last 5-6 years, I had never run a game. So, this year I went ahead and jumped in. I ran several games of All Things Zombie called "The Mean Streets Lazarus". Despite having not played for 6 months, and winging some very unusual situations, I had a good time, and got nothing but good feedback from all the players. Here are some highlights of the weekend:

The Setup
Here are some photos of the setup for a couple of the games. The tiles are all 12x12, and the buildings are paper mounted on foam core.


Our words haunt us
Here are a series of pics that show that a GM needs to watch what he says. In the second game, the question that started it all was "How big is the the explosion of that propane storage tank?" "Twelve inch radius", I replied, not thinking. The next question was "Is the Mk 19 on that HMMWV operational?". "Sure", I replied, quickly adding, "but, you're not military, so you are at a -2 to hit anything with it.". The first pic shows us that if you roll a D6 enough, eventually, you are going to get a 6, as a Ganger pumps a 40mm round into a store full of Zombies. The pics after that shows us how our words sometimes come back to haunt us. The players got a big hoot out of the resultant mayhem; so much so that they did it in 4th game as well.


The best laid plans (or Include everyone in your schemes)
Going back to the second game, the players objective was to find the man with "The Cure". If doubles were rolled on a building search, the doctor was in the building. After finding him, l they had to make their way to the helipad in the center of the board. The doctor had to be on the pad, with no zombies within four inches of it. One of the teams found him on turn 2, remarkably, and headed quickly to the helipad. The other teams moved to intercept them. After a brief, but intense firefight, which cost the lives of several Grunts, and wounded several Stars, a truce was called, as the players decided they would all fly out on the helo together. The rescue helicopter was called in, and the area was cleared of zombies.


This is the point where mistakes that the GM make sometimes work in our favor :-) Our trigger happy Ganger (who happened to be my son) has a little bent out of shape that his Gangers were gong to be left behind, so he started chucking Mk19 rounds at the propane storage tank near the helipad. He got a hit and it went up in a blinding flash. The other players thought it was great, until they realized that the rescue chopper was caught in the rising fireball!

The Rep 3 pilot failed his "Loss Of Control" test and the went spinning into the ground and exploding.

A grizzly end...
In the last game, one to the players encountered four zombies on Turn 1, while searching a gas station. Over the next couple of turns, more and more popped up around him. His two man team fought them off valiantly, and left a path of dead zombies across the board. He decided he needed to get in a jeep to move faster. Unfortunately, a turn in which the Humans didn't activate left his jeep covered with zombies. The driver sped off, with 9 zombies clinging to it. He still had a chance, until the driver was "knocked down" and lost control. The ensuing crash, and resultant explosion, killed everyone, and thing, in and on the jeep; except his STAR, who was left unconscious. Alas, the next turn he became Zombie fodder.


Again in the final game, one of the teams had found the objective (a doctor with "The Cure"), and tried to get him to the helipad for rescue. The two man team ( a Rep 5 Star, and a Rep 4 Grunt) had found 4 Survivors (all Rep 3) while searching for the doctor, so he had a good sized force. The rescue heli wouldn't land, because there were zombies within 4 inches of the pad, so he had to clear the area. His team charged the pad and killed the 4 zombies that were on it. The next turn, Zombies won the initiative. Seventeen Zombies charged the valiant group. Turns out that none of the Rep 3 Survivors were all that valiant, as they all failed their "Being Charged" tests and ran for cover. This left the two team members alone on the pad. The resultant slaughter lead to the a mass of "See The Feast" tests. which led to a mass of insanity, running away, and curling up into fetal positions. Most notably, the rescue pilot decided that all was lost on the ground, and flew off; radioing for the "sterilization process" to be initiated.

Welcome To Lazarus - All Things Zombies Battle Report

(Please Note, this game is a one off game that takes place around Day 9 or 10 during the zombie outbreak in Lazarus. It doesn't really have anything to do with my current campaign.)

Things had fallen apart quicker than anyone could have imagined. The authorities did the best they could. When it became obvious that the dead were truly coming back and feasting on the living, all bets were off, though. Human nature took over and the flight portion of the "fight or flight" instinct took over. Survivors streamed out of the city, fending for themselves; trying to reach safety, their families, or whatever drove them to take another step forward. In small groups, the survivors made their way into the suburbs, in hopes of making out of the city.

View of Lazarus


Turn 1 – Four survivors move down the road. Their intent is to make it to the safety of the Police Station in the town of Lazarus. They move Indian file, with SWAT Sgt Thomas (Rep 4, Brawler, BAMP) in the lead. He is followed by Officer Gates (Rep 3, Slow, Shotgun), who is still in his off duty attire. Behind him is SWAT Officer Stanley (Rep 3, Brawler, Pistol). Bringing up the rear is Police Detective Benton (Rep 4, Slow, ARifle) He is armed with a fully auto AK-47, taken from a now undead gang banger.

Zombie Knockdown

Turn 2 – A Zombie rises up out of ditch on the far side of the road. Det. Benton is startled by the zombies appearance, and fires off a three round burst, striking the zombie squarely in the chest and knocking it into the ditch. Knowing that the gunfire will attract more undead, the men break into a run, with Sgt Thomas and Officer Stanley easily out pacing the two slower men.

Turn 3 – The zombie in the ditch pulls itself to its feet, and another appears from around the corner.

Making a run for it


Turns 4/5 – The survivors continue to run towards the safety of the Police Station. The two zombies shamble along after them. Sgt Thomas and Stanley stop at the intersection and wait for the other two to catch up.

Turn 6 – The zombies continue their pursuit, as the 4 men gather themselves on the corner, down the block from the Police station.
Turns 7/8 – The zombies press forward, as the survivors attempt to get their bearings and catch their breath.

A zombie charges Off. Gates


Turn 9 – Our survivors took too long to get moving. The first zombie charges Officer Gates. He holds his fire and brings the butt of his shotgun down on the zombie's head. It's obvious that the zombie is not dead, as it tries to get back up. The four men move down the block to the front door of the police station.

Entering The Police Station


Turn 10 – Sgt Thomas and Officers Gates and Stanley enter the building, while Det. Benton takes up a position behind an abandoned sports car. He covers the front of the building, as the other three clear the building. As the three men enter, it is obvious that there are no survivors on the first floor. They are greeted by two advancing undead. Sgt Thomas dispatches the first zombie with a single shot to the head. Officer Stanley shoots the second one in the leg, causing it to fall to the ground. As it wallows on the floor, he "pops" it in the middle of the forehead.

Clearing the 1st Floor


Zombies Advance


Turn 11 – The gun fire attracts two more zombies. One rises from the shadows in the alley; mere feet from Det. Benton. With deceptive speed, it charges him. The sight of the attacking zombie un-nerves Benton, and he makes a break for the police station. He makes it safely inside and bolts the doors.

Zombies beating on the door


Turn 12 – As Det. Benton huddles under the duty desk in terror, listening to the zombies beating on the front doors, the other three men begin to clear the second floor. They advance carefully up the stairs and down the main hallway. Suddenly, a zombie lurches from a doorway; clawing at Sgt. Thomas. He rips off a burst from his MP-5, knocking the zombie back into the wall. As Officers Stanley and Gates watch this, two more zombies charge into the hall; taking them by surprise. One zombie grabs Officer Gates, who fights for his life; keeping the zombie at bay. The other undead crashes into Officer Stanley, throwing him into the wall. His head hits the floor, with the sound of a melon. He is out of the fight. The zombie moves in for the kill.

Officer Stanley goes down

Turn 13 – The gunfire from inside the building has attracted another zombie, which searches the alley in the back of the station for an entrance. Sgt. Thomas "pops" the zombie on the floor, and turns his weapon on the zombie attacking Officer Stanley. He fires a burst into its back, knocking it down. Officer Gates does a leg sweep, and knocks the zombie attacking him to the floor. He quickly dispatches it with a head shot.

Zombie emerges from Speedy Bail Bonds

Turn 14 – A zombie shuffles out of the Speedy Bail Bonds office, on the side of the station building. The zombie remaining zombie inside the Police Station, claws it way to its feet. As it does so, both Sgt Thomas and Officer Gates move in and start to bludgeon it.

Zombies gather at the door


Turn 15 – On the second floor, the remaining zombie attacks Sgt Thomas, it snaps at him viciously. Sgt Thomas bashes it with the butt of his weapon, to no effect. Officer Gates moves in behind the zombie and kicks its legs out from underneath it. He finishes it off with a well placed shot to the back of the head.

Aftermath – With the building secure, the men set about business. After finding some medical supplies, Sgt Thomas tended to Officer Stanley. Unfortunately, his head wound was too grievous, and he died later that night. The men solemnly put a bullet into his head, so that he wouldn't rise from the dead. They searched the building for useful items. They found 2 pistols, allowing the three remaining survivors each to have a side arm. The also found a Tech-9 (MPistol) and several cases of ammo in the evidence locker. Along with the reloads on them, they had more in their sanctuary, along with the now deceased Officer Stanley's body armor. They couldn't find any keys to the police cruiser parked outside, so they speculated that the keys may be in it. They also found a roll of Duct tape (ATZ Rare Loot table from THW site). This might come in useful, later. After a time, Detective Benton regains his nerves and seems to be his old self again (recovery from the Runaway, result earlier)